CDL Pre-Trip Inspection Checklist: Pass Every Time
A complete CDL pre-trip inspection checklist covering every component examiners test during your skills exam. Includes the engine compartment, cab interior, external walk-around, coupling system, and brake check sequences with tips for memorizing the order.
TruckingJobsInUSA Team
TruckingJobsInUSA
The pre-trip inspection is one of the three parts of your CDL skills test, and it is the section where most failures happen. Examiners want to see that you can systematically inspect a commercial vehicle, identify potential safety issues, and explain what you are checking and why. This checklist covers every component you need to know, in the order most examiners expect to see them.
Why the Pre-Trip Matters
Beyond passing your test, pre-trip inspections are a legal requirement for every trip you make as a CDL driver. Federal regulation 49 CFR 392.7 requires drivers to be satisfied that the vehicle is in safe operating condition before driving it. A thorough pre-trip takes 15-20 minutes on a real truck and can prevent breakdowns, accidents, and costly roadside violations. Drivers who skip or rush their pre-trip are the ones who end up stranded with a blown tire they could have caught or placed out of service at a weigh station for a brake deficiency.
Engine Compartment
Start under the hood with the engine off and the parking brake set. Check the engine oil level on the dipstick, ensuring it is between the min and max marks. Inspect the coolant level in the overflow reservoir (never open the radiator cap on a hot engine). Check the power steering fluid reservoir. Inspect all belts for cracks, fraying, and proper tension. Push on each belt with your thumb; there should be no more than three-quarters of an inch of give. Check all hoses for leaks, bulging, or cracking, paying special attention to connections at the water pump, radiator, and heater core. Inspect the air compressor and its connections. Look for any fluid leaks under the engine, including oil, coolant, power steering fluid, and fuel.
Check the alternator, ensuring it is securely mounted and the wiring is intact. Inspect the water pump for leaks at the weep hole. Verify that the engine block heater cord (if equipped) is not damaged. Look at the frame rails visible from the engine compartment for cracks or damage. Finally, check the windshield washer fluid level and ensure the wiper mechanisms are functional.
Cab Interior Check
Enter the cab and ensure the parking brake is set. Check that the vehicle is in neutral (or park for automatics). Start the engine and listen for unusual noises. Check all gauges: oil pressure should come up within seconds of starting, air pressure gauge should begin building, coolant temperature should be in the normal range, voltmeter should show charging. Test the horn. Check that all mirrors are clean, properly adjusted, and securely mounted. Test the windshield wipers and washers on all speeds. Verify the heater and defroster work. Check the seat belt for proper function and that the seat adjusts correctly.
Test all indicator lights on the dashboard. Check the emergency equipment: fire extinguisher (fully charged, accessible, proper rating), three reflective triangles, and spare fuses if your vehicle uses them. With the engine running and air pressure built to governor cut-out (typically 120-140 psi), perform the air brake check: turn off the engine, release the parking brake, and press the brake pedal. The air pressure should not drop more than 3 psi in one minute for a single vehicle or 4 psi for a combination. The low air pressure warning should activate before air pressure drops below 60 psi.
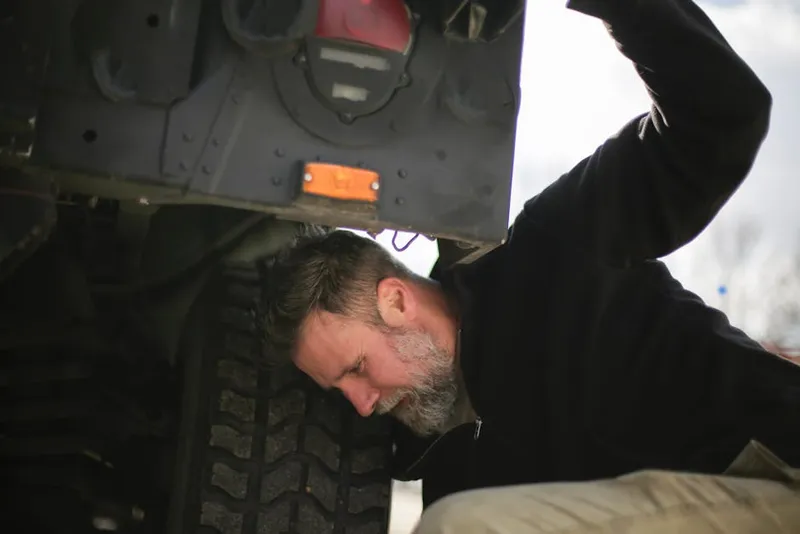
External Walk-Around
Begin at the driver's door and work clockwise around the vehicle. At each wheel, check the tire condition (tread depth must be at least 4/32 inch on steer tires and 2/32 inch on drive and trailer tires), tire inflation (no obviously flat or underinflated tires), lug nuts (all present, no rust streaks indicating looseness), hub oil seals (no leaks), and brake components visible through the wheel. Brake drums or rotors should not be cracked, and brake linings should be visible and not worn past minimum thickness. Check that brake chambers are not leaking and that push rod travel is within limits.
Inspect the suspension at each axle: leaf springs should not be cracked, broken, or shifted; air bags should be properly inflated and not leaking; shock absorbers should be securely mounted. Check the frame and cross members for cracks, bends, or missing bolts. Inspect all lights: headlights (high and low beam), turn signals, four-way flashers, marker lights, clearance lights, identification lights, brake lights, tail lights, and license plate light. All lenses should be clean and the correct color (red rear, amber side and front).
Coupling System (Combination Vehicles)
If testing in a tractor-trailer, inspect the fifth wheel: it should be securely mounted to the frame, the locking jaws should be closed around the kingpin, the release handle should be in the locked position, and there should be no visible gap between the upper and lower fifth wheel plates. Check the air and electrical lines between the tractor and trailer: glad hands should be securely connected and sealed, no air leaks audible, the electrical cord should be firmly plugged in with no visible damage. The trailer should be sitting level or slightly nose-down on the fifth wheel. Landing gear should be fully raised with the crank handle secured.
Brake System Tests
With the engine running and full air pressure, perform the applied leakage rate test (hold the brake pedal firmly for one minute and check for excessive pressure drop). Test the parking brake by setting it and gently trying to move the vehicle in a low gear; the brakes should hold. Test the service brakes by driving forward slowly (about 5 mph) and applying the brakes firmly; the vehicle should stop smoothly and in a straight line without pulling. For air brakes, test the low pressure warning by pumping the brake pedal with the engine off to reduce air pressure; the warning buzzer or light must activate before pressure drops below 60 psi. Continue pumping; the spring brakes (parking brake) should pop out automatically between 20-40 psi.
Tips for Passing the CDL Pre-Trip Test
- Develop a consistent routine. Start at the same spot every time and follow the same sequence. This prevents you from forgetting components under test pressure.
- Explain as you inspect. The examiner needs to hear that you know what you are checking and why. Say "I am checking the power steering fluid level to make sure it is within the safe operating range" rather than just pointing at the reservoir.
- Touch what you check. Grab the components, tug on connections, push on belts. Examiners want to see hands-on inspection, not a visual glance from three feet away.
- Practice on a real truck. Memorizing a list is not enough. You need to be able to identify and locate every component on the actual vehicle you will test in. Check our 30-day CDL fast track guide for more test prep tips.
- Know your air brake numbers. Governor cut-in and cut-out pressures, maximum leakage rates, low air warning activation pressure, and spring brake pop-out pressure are commonly tested and must be answered correctly.